Excel is a powerful tool for data analysis, and using macros can streamline many tasks, including adding rows automatically. This article will delve into the world of Excel macros, explaining how to create a macro that adds rows automatically under specific conditions.
Understanding Excel Macros
Before diving into the specifics of creating a macro to add rows automatically, it's essential to understand what macros are and how they work in Excel. A macro is a series of commands that are recorded or written in Visual Basic for Applications (VBA), the programming language used by Excel. Macros can automate repetitive tasks, making your work more efficient.
Why Use Macros to Add Rows Automatically?
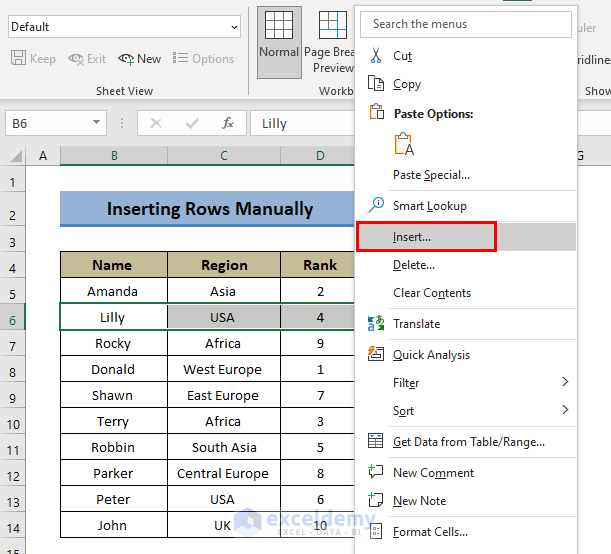
Manually adding rows in Excel can be time-consuming, especially when dealing with large datasets. A macro that adds rows automatically based on predefined conditions can save you a significant amount of time and reduce the risk of errors.
Creating the Macro
To create a macro that adds rows automatically, follow these steps:
-
Enable the Developer Tab:
- Go to File > Options > Customize Ribbon.
- Check the box next to "Developer" and click OK.
-
Open the Visual Basic Editor:
- Press Alt + F11 or navigate to Developer > Visual Basic.
-
Insert a New Module:
- Right-click on any of the objects for your workbook listed in the Project Explorer.
- Choose Insert > Module.
-
Write the Macro:
Sub AddRowsAutomatically()
    ' Declare variables
    Dim ws As Worksheet
    Dim LastRow As Long
    Dim i As Long

    ' Set the worksheet
    Set ws = ThisWorkbook.Worksheets("Sheet1")

    ' Find the last row with data
    LastRow = ws.Cells(ws.Rows.Count, "A").End(xlUp).Row

    ' Add rows based on a condition (e.g., if column B is empty)
    For i = LastRow To 2 Step -1
        If ws.Cells(i, "B").Value = "" Then
            ws.Rows(i).Insert Shift:=xlDown
        End If
    Next i

    ' Clean up
    Set ws = Nothing
End Sub
This macro checks column B for empty cells and adds a new row above each empty cell. You can modify the column and the condition to fit your needs.
-
Save Your Workbook as a Macro-Enabled File:
- Go to File > Save As.
- Choose "Excel Macro-Enabled Workbook (*.xlsm)" as the file type.
Running the Macro
To run your macro, you can either:
- Press Alt + F8, select the macro, and click Run.
- Assign the macro to a button or shortcut for easier access.
Tips for Working with Macros
- Backup Your Workbook: Before making significant changes with macros, ensure you have a backup of your workbook.
- Use Relative References: When recording macros, use relative references instead of absolute references to make the macro more flexible.
- Test Your Macro: Always test your macro in a safe environment to avoid unintended changes to your data.
Common Issues and Troubleshooting
- Macro Not Running: Check if macros are enabled in your Excel settings and if the workbook is saved in a macro-enabled format.
- Unexpected Results: Review your macro code, and ensure the logic and references are correct.
Conclusion
Creating a macro to add rows automatically in Excel can significantly streamline your workflow, especially when dealing with large datasets. By following the steps outlined in this article, you can automate the process of adding rows based on specific conditions, saving time and reducing the risk of errors. Remember to always test your macros in a safe environment and to backup your workbooks before making significant changes.


What is the purpose of using macros in Excel?
+Macros are used in Excel to automate repetitive tasks, making work more efficient. They can perform a variety of actions, such as formatting, data manipulation, and even adding rows automatically.
How do I enable macros in Excel?
+To enable macros, go to File > Options > Trust Center > Trust Center Settings > Macro Settings. Choose "Enable all macros" and click OK.
What file format should I use to save a macro-enabled workbook?
+To save a workbook with macros, you should use the "Excel Macro-Enabled Workbook (*.xlsm)" file format.

