Calculating months between dates in Excel can be a useful skill, especially when working with data that involves time periods, deadlines, or scheduling. While Excel provides various methods to achieve this, one of the simplest and most straightforward ways is by using a basic formula. In this article, we will explore how to calculate months between dates in Excel using a simple formula.
The Challenge: Calculating Months Between Dates
When working with dates in Excel, you might need to calculate the number of months between two dates. This could be to determine the duration of a project, the number of months a customer has been subscribed to a service, or the time elapsed between two events. Excel provides several functions to manipulate dates, but for calculating months between dates, we can use a simple arithmetic approach.
The Simple Formula:
To calculate the number of months between two dates, you can use the following formula:
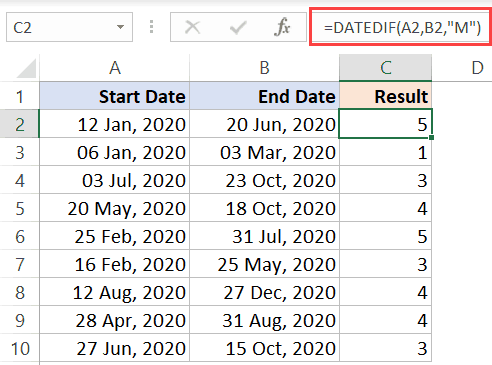
=DATEDIF(start_date, end_date, "M")
Where:
start_dateis the earlier date.end_dateis the later date."M"is the interval that specifies you want to calculate the months.
This formula works by subtracting the start date from the end date and then calculating the number of months in the resulting period. However, it's worth noting that the DATEDIF function can be a bit quirky and is not compatible with all Excel versions. A more universally applicable approach is to use arithmetic to calculate the months:
=MONTH(end_date) - MONTH(start_date) + (YEAR(end_date) - YEAR(start_date)) * 12
This formula works by first calculating the difference in months between the two dates, and then adding the difference in years multiplied by 12 to account for the months in each year.
Using the Formula:
To use either formula, follow these steps:
- Open your Excel spreadsheet and select the cell where you want to display the result.
- Type either of the formulas above, replacing
start_dateandend_datewith the actual cell references or dates you are working with. - Press Enter to calculate the result.
Example:
Suppose you have two dates in cells A1 and B1, and you want to calculate the number of months between these dates in cell C1. If the date in A1 is January 1, 2022, and the date in B1 is March 15, 2023, the formula would look like this:
=MONTH(B1) - MONTH(A1) + (YEAR(B1) - YEAR(A1)) * 12
After pressing Enter, the result in cell C1 would be 14, indicating that there are 14 months between the two dates.
Tips and Variations:
- Negative Results: If the end date is before the start date, the formula will return a negative result. To avoid this, ensure that the start date is always before the end date.
- Partial Months: The formula calculates whole months. If you need to account for partial months, consider using the
DATEDIFfunction with the"D"interval to calculate the days and then divide by 30 or 31 to approximate the months. - Leap Years and Month Length: The formula does not account for the varying lengths of months (28/29 days for February, 30 or 31 days for other months) or leap years. For most applications, this approximation is sufficient, but for precise calculations, you might need a more complex formula.
Conclusion:
Calculating the number of months between dates in Excel is straightforward with the right formula. While there are several methods to achieve this, the arithmetic approach using MONTH and YEAR functions provides a simple and universally applicable solution. By mastering this technique, you can efficiently work with date data in Excel and solve a wide range of problems involving time periods and scheduling.

Common Applications and Variations
Calculating months between dates has a wide range of applications, from project management and finance to data analysis and beyond. Here are a few common scenarios and how you might adapt the formula to suit your needs:
Project Duration
When managing projects, knowing the duration in months can be crucial for scheduling and resource allocation. By calculating the months between the project start and end dates, you can plan more effectively.
Financial Calculations
In finance, calculating months between dates is essential for determining interest payments, investment returns, and more. By adjusting the formula to consider the specific financial context, you can make accurate calculations.
Data Analysis
In data analysis, calculating the time between events or the duration of a status can provide valuable insights. By applying the formula to your data, you can uncover trends and patterns that inform your decisions.
Customizing the Formula for Specific Needs
While the basic formula works well for most scenarios, you might need to customize it for specific requirements. Here are a few ways to adapt the formula:
- Including or Excluding the Start Date: Depending on your needs, you might want to include or exclude the start date in your calculation. By adjusting the formula accordingly, you can achieve the desired outcome.
- Calculating Partial Months: For applications where partial months are significant, consider using a more complex formula that accounts for the days in each month.
- Working with Time Zones: When working with dates across different time zones, ensure that your formula correctly accounts for the time zone differences.

Best Practices for Working with Dates in Excel
When working with dates in Excel, following best practices can save you time and reduce errors. Here are a few key considerations:
- Use the Correct Date Format: Ensure that your dates are in the correct format for your region and that Excel recognizes them as dates.
- Use Date Functions: Excel provides a range of date functions that can simplify your work. Familiarize yourself with these functions to improve your efficiency.
- Avoid Hard-Coding Dates: Instead of typing dates directly into your formulas, consider using cell references or named ranges. This makes your formulas more flexible and easier to maintain.
- Consider Time Zones: When working with dates across different time zones, ensure that your formulas correctly account for the time zone differences.
Advanced Date Calculations in Excel
While calculating months between dates is a common task, Excel offers a range of advanced date calculations that can help you analyze and manipulate your data more effectively. Here are a few examples:
- Calculating the Number of Days Between Dates: By using the
DATEDIFfunction with the"D"interval, you can calculate the number of days between two dates. - Determining the Last Day of the Month: By combining the
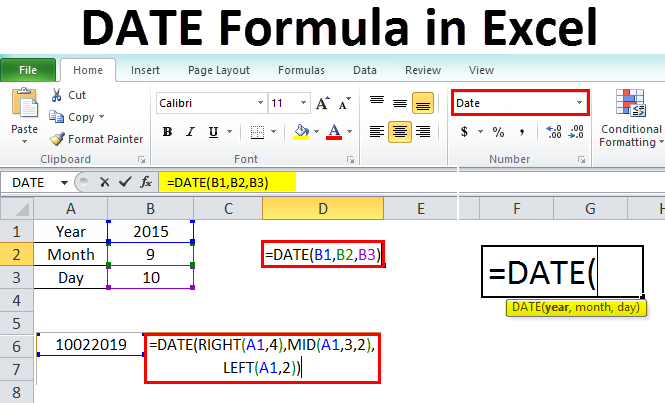
DATEandDAYfunctions, you can determine the last day of the month for any given date. - Calculating the First Day of the Month: Similarly, you can calculate the first day of the month by using the
DATEandDAYfunctions.

Gallery of Excel Date Formulas


How do I calculate the number of months between two dates in Excel?
+To calculate the number of months between two dates in Excel, you can use the formula `=MONTH(end_date) - MONTH(start_date) + (YEAR(end_date) - YEAR(start_date)) * 12`.
What is the best way to work with dates in Excel?
+The best way to work with dates in Excel is to use the correct date format, use date functions, avoid hard-coding dates, and consider time zones.
How do I calculate the last day of the month in Excel?
+To calculate the last day of the month in Excel, you can use the formula `=DATE(YEAR(A1), MONTH(A1) + 1, 0)`.