Auto-incrementing an Excel column can be a huge time-saver when dealing with large datasets. Whether you're a data analyst, accountant, or simply someone who loves to stay organized, learning how to auto-increment an Excel column is a valuable skill to have.
In this article, we'll explore five different ways to auto-increment an Excel column, including using formulas, VBA macros, and Excel's built-in features.
Why Auto-Increment an Excel Column?
Before we dive into the different methods, let's quickly discuss why you might want to auto-increment an Excel column. Some common use cases include:
- Creating a unique identifier for each row in a dataset
- Assigning a sequential number to each item in a list
- Creating a counter for tracking purposes
- Automating the numbering of rows or columns
Now, let's get started with our first method!
Method 1: Using a Formula
One of the simplest ways to auto-increment an Excel column is by using a formula. Here's an example:
- Select the cell where you want to start the auto-increment (e.g., A1).
- Type the formula
=ROW(A1)and press Enter. - Drag the fill handle (the small square at the bottom-right corner of the cell) down to fill the formula into the rest of the cells in the column.
This formula uses the ROW function to return the row number of the current cell, effectively auto-incrementing the column.

Method 2: Using VBA Macro
If you're comfortable with VBA macros, you can create a custom macro to auto-increment an Excel column. Here's an example:
- Open the Visual Basic Editor by pressing Alt + F11 or navigating to Developer > Visual Basic.
- In the Visual Basic Editor, click Insert > Module to create a new module.
- Paste the following code into the module:
Sub AutoIncrementColumn()
    Dim rng As Range
    Set rng = Range("A1:A100") ' adjust the range to your needs
    For i = 1 To rng.Rows.Count
        rng.Cells(i, 1).Value = i
    Next i
End Sub
- Click Run > Run Sub/UserForm to execute the macro.
This macro uses a For loop to iterate through the specified range and assign a sequential number to each cell.

Method 3: Using Excel's AutoFill Feature
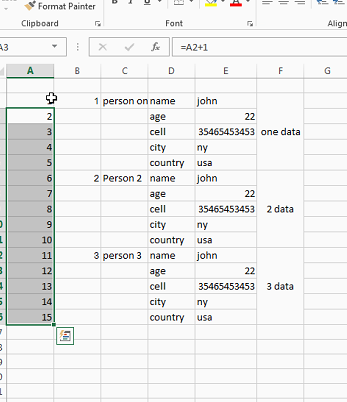
Excel's AutoFill feature can also be used to auto-increment a column. Here's how:
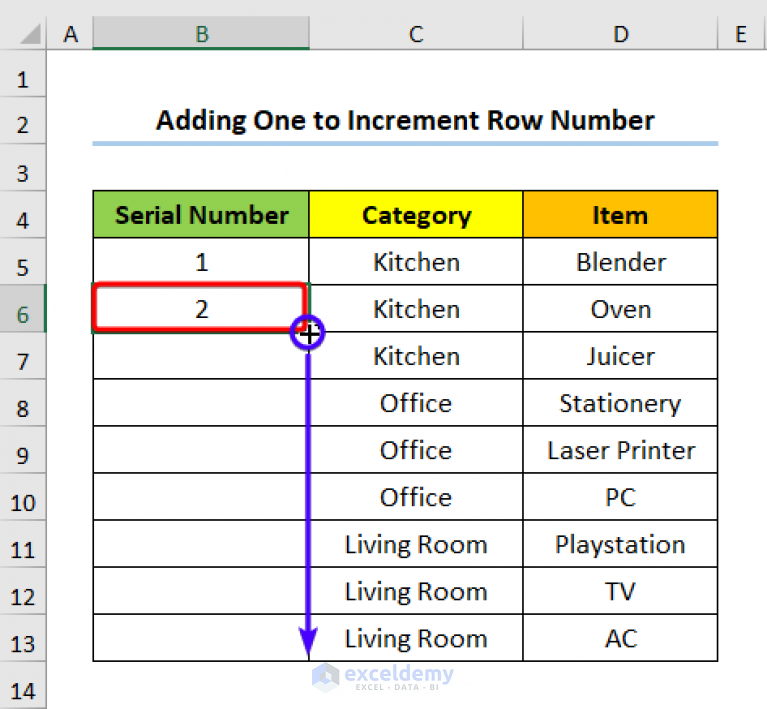
- Select the cell where you want to start the auto-increment (e.g., A1).
- Type the starting number (e.g., 1) and select the cell.
- Move the cursor to the bottom-right corner of the cell until you see the AutoFill handle.
- Click and drag the AutoFill handle down to fill the rest of the cells in the column.
This method is quick and easy, but it only works for simple sequential numbering.

Method 4: Using Excel's Formula AutoComplete
Excel's Formula AutoComplete feature can also be used to auto-increment a column. Here's how:
- Select the cell where you want to start the auto-increment (e.g., A1).
- Type the formula
=ROW(A1)and press Enter. - Move the cursor to the bottom-right corner of the cell until you see the AutoComplete dropdown.
- Select the "AutoFill" option to fill the rest of the cells in the column.
This method is similar to Method 1, but uses the AutoComplete feature to speed up the process.

Method 5: Using Power Query
If you're using Excel 2013 or later, you can use Power Query to auto-increment a column. Here's how:
- Select the cell where you want to start the auto-increment (e.g., A1).
- Go to Data > New Query > From Other Sources > Blank Query.
- In the Power Query Editor, click Add Column > Index Column.
- Select the starting number (e.g., 1) and click OK.
- Load the query into your worksheet.
This method is powerful and flexible, but requires some knowledge of Power Query.

Gallery of Auto-Increment Excel Column Examples


Frequently Asked Questions
How do I auto-increment a column in Excel?
+There are several ways to auto-increment a column in Excel, including using formulas, VBA macros, and Excel's built-in features.
What is the best way to auto-increment a column in Excel?
+The best way to auto-increment a column in Excel depends on your specific needs and preferences. If you're looking for a simple solution, using a formula or AutoFill may be the best option. If you need more advanced functionality, using a VBA macro or Power Query may be the way to go.
How do I use Power Query to auto-increment a column in Excel?
+To use Power Query to auto-increment a column in Excel, select the cell where you want to start the auto-increment, go to Data > New Query > From Other Sources > Blank Query, and then use the Add Column > Index Column feature to create a new column with sequential numbers.
We hope this article has helped you learn how to auto-increment an Excel column using different methods. Whether you're a beginner or an advanced user, these techniques will help you work more efficiently and effectively in Excel.
